The Bathroom renovation is under way and I’ve been obsessed with installing a patterned wall. A stunning patterned wall can add character to any bathroom while being practical and timeless. This pattern is vintage while still neutral enough to go with any theme. In this case, I wanted a beachy yet girly bathroom. Patterned tiles are great for walls and floors. Here’s how I created my patterned tile wall!
THE PREP
Order tile - I got my tile from home depot. They have a great tool that will tell you exactly how many boxes you need when you enter square footage
Redgard walls - If your patterned tile wall is going to be part of the shower you’ll need to redgard that area to ensure it is waterproof and mold resistant
Before I get started I always watch this video to remind myself the basix
Mix thinset - we used Versabond Thinset in white follow directions on box for mixing instructions
GET STARTED
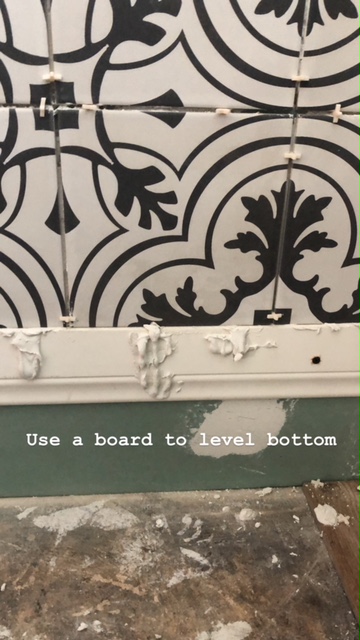
Place leveling board to start first row - This will ensure your second row (and all remaining rows) are level - you will have go back and add first row later. The top of the level board should be tile’s height + ⅛ from the floor.
Use a leveling board to level patterned tile
Spread thinset - Spread thinset on a large area by scooping and applying at a 45 degree angel with a trowel. Make sure thinset is even. The video linked earlier is a helpful example of this.
Place tiles above leveling boards in square groups of 4 - Make sure corners match up. Patterened tile can be tricky… if the tiles aren’t perfectly matched up the pattern can start to look weird
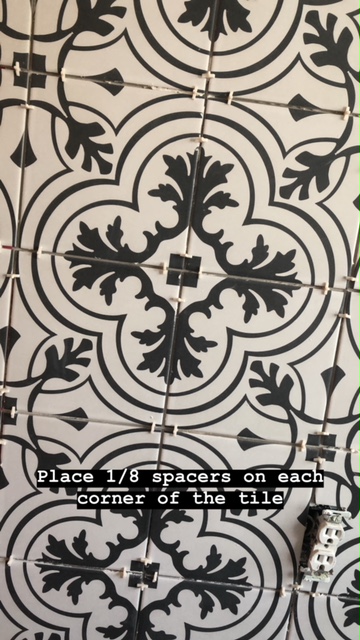
Use ⅛ spacers to separate tiles - make sure spacers are on each corner of the tile.
Spacers on corners of the tile
Repeat - keep going until your wall is all filled with full tiles.
Wall tiles are up and placed!
THE TRICKY PART
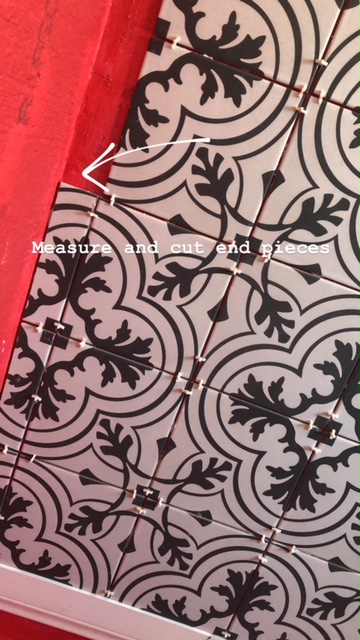
Now that you have a full tiles places you will have to cut and trim tiles to fit in the extra space. When you are cutting make sure the pattern matches up! We wasted a lot of tile not thinking about the pattern.
Mark tiles - Line up tiles with previous rows and mark cut line with sharpie. Remember to leave 1/8 of an inch for the spacers.
Cut tile - Use wet tile saw to cut tiles.
Set tiles - Spread thinset on the back of the cut tile like you are buttering a piece of toast. Place tiles in left over space and place spacers on each corner.
Finish bottom row - Remove level board. Place first row of tiles.
GROUT
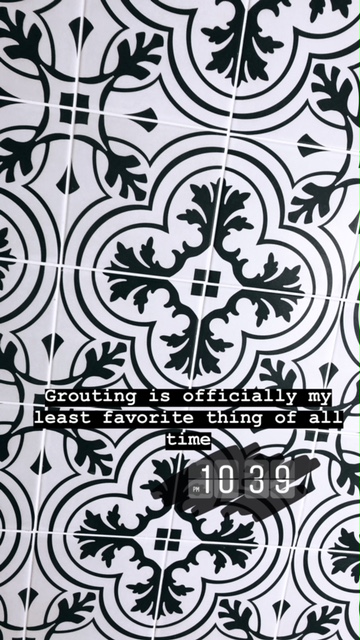
REAL TALK - I hate grouting! Grouting tile walls can be tedious because the excess grout when wiped, easily smears on pattern tiles and creates a haze and streaks. I found a trick to avoid this is to KEEP YOUR SPONGE CLEAN. This process will take a while so throw on your fav netflix show in the background, grab a starbs, and gear up girl!
The nice thing about grouting is there are step by step directions on the back of the box, how much simpler can it get?
STEP PIC HERE
PREP:
I watched this video as inpo
Buy grout - We used polyblend non-sanded grout in bright white (You can use non-sanded grout for grout lines ⅛ or smaller )
Mix grout - Mix grout according to directions on box. Always start with a small amount of water (just enough to fill the bottom of the bucket) ad sand and mix. A good rule of thumb is grout should be the consistency of toothpaste or peanut butter.
Remove spacers - Allow thinset to dry (see packaging for dry time). Make sure to remove all spacers once dry.
Clean grout lines - make sure no thinset is sitting above the tile or on the surface of the tile. clean with a screwdriver or anything that fits.
LET’S DO IT
Spread grout - Spread grout using a grout float at a 45 degree angle over an area of tiles. Make sure to get grout into the gaps the spacers created.
Clean excess grout - Wait 10 mins (or as long as directed on the box) and rinse of excess with a large grout sponge. Keep your sponge clean by rinsing in the sink instead of a large bucket. Make sure to only use each grout sponge once to avoid spreading excess grout.
Fill in missing spots - Check grout line for missed spots, fill in as needed (I used my finger).
Repeat.
Polish - After about 20 minutes check tiles for haze. Use a seperate sponge with microfiber side or microfiber cloth to clean/polish tiles. Avoid using this sponge across grout lines and only use inside the tile surface itself. Keep this sponge clean by rinsing with clean water instead of a bucket.
I finally finished grouting after a long day of teaching! But check out those grout lines!
TIP: MAKE SURE YOU WEAR GLOVES!! I was too cool for gloves my first time around and my hands looked like an old lady’s for about 3 days straight, no joke. Not cute.
SEAL
Watch this handy vid for how to seal
Pour sealer into a paint tray
We used 5-1-1 and still have some left over!
Use a mop or paint roller to spread a thin layer of sealer
Wipe excess with a clean microfiber cloth (I was a little confused with “excess” was, basically any sealer that is dripping or bubbling up)
Let dry and you are done!


