
PREP
1) Get your wood - I used underlayment plywood that was $10 for a whole board 4 by 8 ft board (.106 in thick)! I got 3 to cover the entire wall. (Total: $30)
2) Cut wood - I had Home Depot cut the wood for me. Make sure cuts are even 6 inches wide (or whatever size you want) this will matter a lot when it comes to getting planks level and spaces even. (Planks ended up 6 inches by 8 ft).
3) Sand wood - Make sure edges are sanded. This will make it much easier to paint and create a finished look.
4) Find studs & mark on wall - once you have nailed the first few planks you can use those nails as a guide for location of studs.
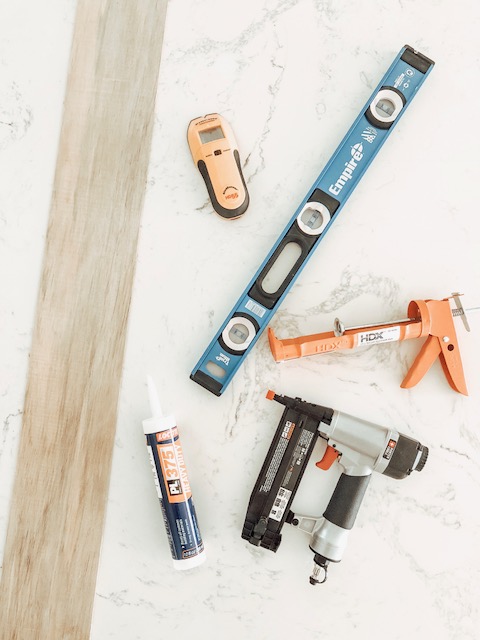
SUPPLIES
Planks (6 in. x 8 ft.)
Construction Glue
Caulking Gun
Level
Nail Gun and Nails
Stud Finder
Nickels
Sand Paper
NOTE - YOU'LL NEED SOME BIG TOOLS:
You will need a tool for trimming the wood to the length needed. I used a miter saw or circular saw.
You will also need a tool for cutting small squares for outlets. I used a jigsaw.
DOIN IT - DAY 1
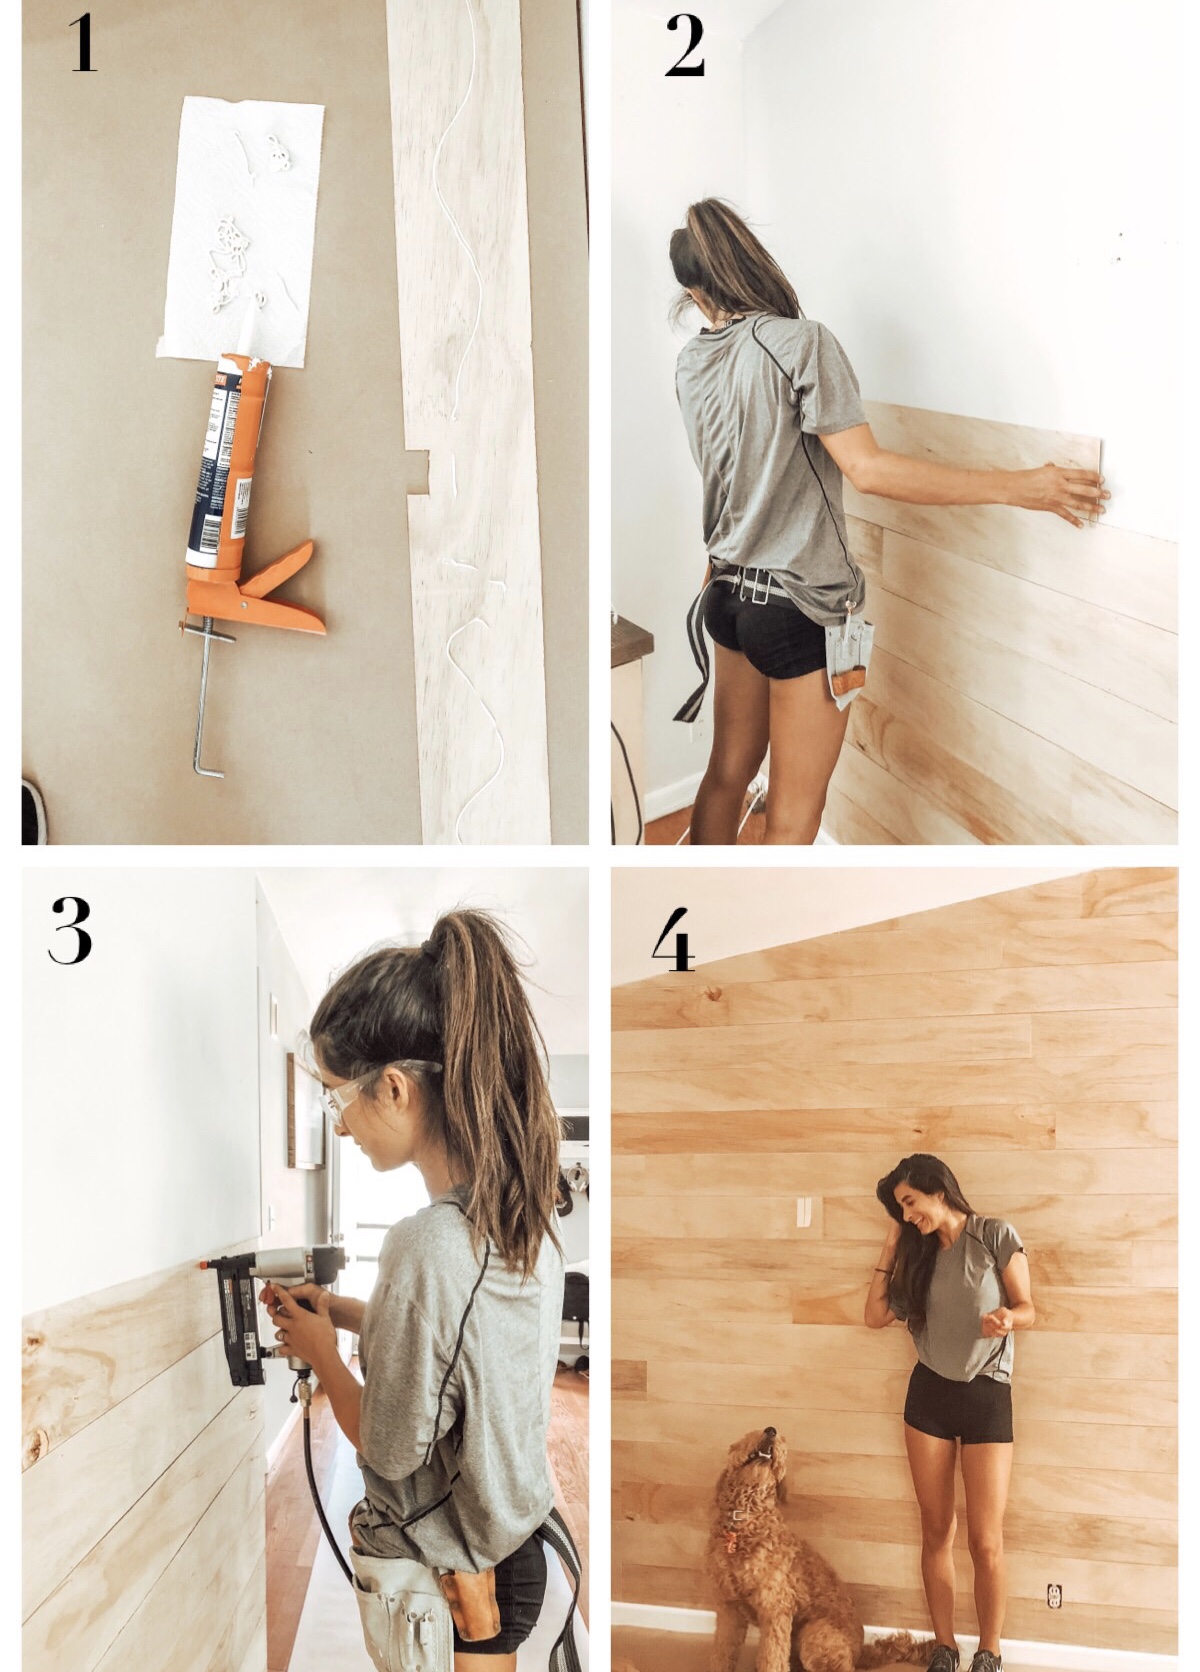
Squeeze contstruction glue on the back of the plank. Make sure first plank is level… this will make the rest super easy
Place 8 ft. plank on wall. Measure left over space - distance from end of the plank to end of the wall. Cut another plank to fit and glue.
Nail in using nail gun on ends and studs.
Repeat with next plank! Place nickel between bottom plank and top plank (To make sure gaps are even). Check to make sure plank is level. Repeat glue and nail gunning until you have reached the top.
NOTE: To avoid creating a "pattern" use different lengths of planks. You can even cut it randomly and go from there!
Once you reach the top you will most likely have to cut a custom piece to fit because most ceilings are not square (SO ANNOYING). I usually do this by using big butcher paper to create a pattern.
Here’s how:
Cut butcher paper to the normal size of a plank. Place in between ceiling and top plank. Using a pencil mark the edge where the wall and ceiling meet. Cut paper accordingly. Use this paper to cut your wood using a circular or jigsaw.
Have a cocktail and celebrate you are done with day ONE!
DOIN IT - DAY 2
1. Prime wood planks with a multipurpose primer
2. Paint with any white you want! (I used Shermin Williams Extra white). Make sure paint coats are thin and light. Do multiple light coats instead of 2 heavy coats. If you do heavy coats your planks will most likely expand and pop off the wall! Yikes!
3. Celebrate, post on stories, take a pic! You are DONE! ENJOY!


I decided to do a wall in my dinning room too! I’m OBSESSED with the way it turned out!


